 |
 |
||||||
|
|||||||
| iPads and Teacher Education: eBooks | |||||||
| You are here >> Tablets and Teaching Education >> eBooks | |||||||
| Book Creator (online version) support | |||||||
Book Creator on the Web is similar to the App verion (see this page). The key thing, as with much software, is to 'play' and explore the options. However, before you start to create the book should should already have a plan for your book. See the PACDAD model on the previous page for the planning process. |
|||||||
| 1. Getting Started | |||||||
| Before you can use the software you need to create an account. If you have a Google Account you can use this to sign in, or you can create a new account. You can do this as a student or as a teacher. Either is fine. | |||||||
 |
|||||||
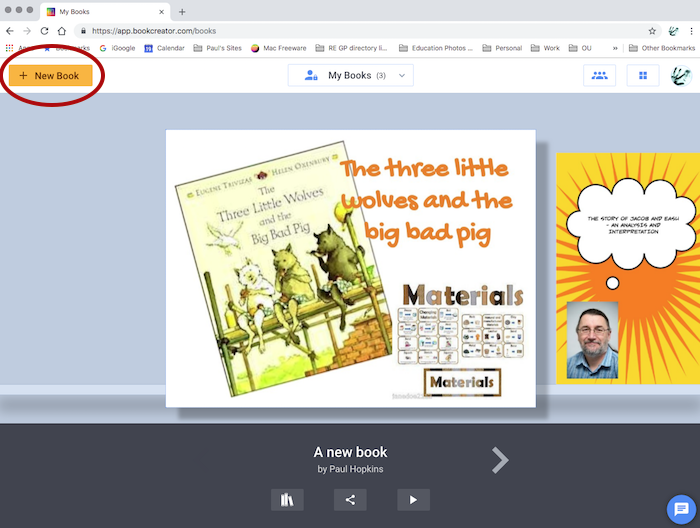
| Now you will see the option (top left) to create a new book. Click on this. | |||||||
 |
|||||||
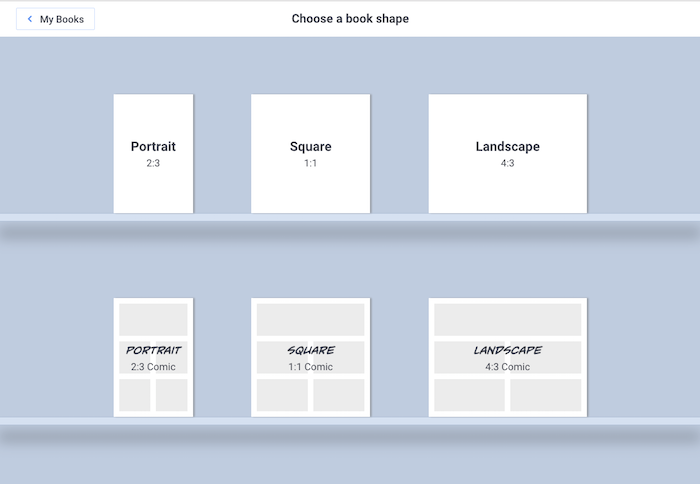
| Now you will have some options on how you want your book to look. You have the choice of a number of formats either as plain pages or as an animated style - choose which ever you think is most appropriate for your book. | |||||||
 |
|||||||
| 2. Adding Content | |||||||
 |
|||||||
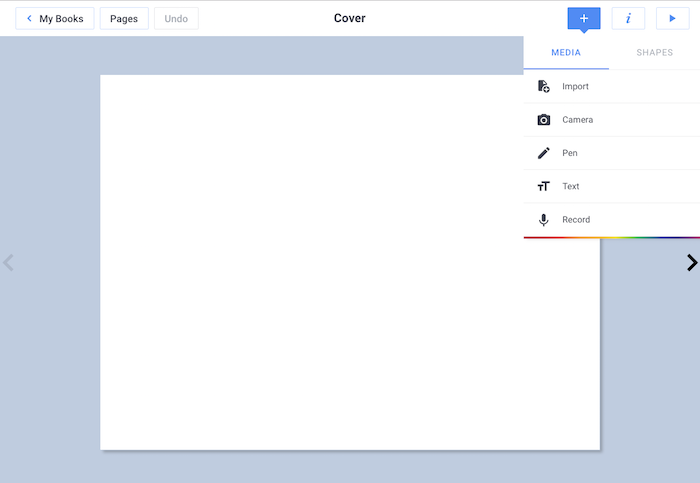
Once you have opened your book you can start to add content. In the top right corner you will see the three icons including the + icon. Tapping on the + icon will give you options to add content:
Note: there is also another tab called "shapes" this allows you to add a range of shapes (including squares, circles, trianges, arrows, starts, rounded oblongs, lines, speech and thought bubbles. |
|||||||
| 3. Editing Content | |||||||
 |
|||||||
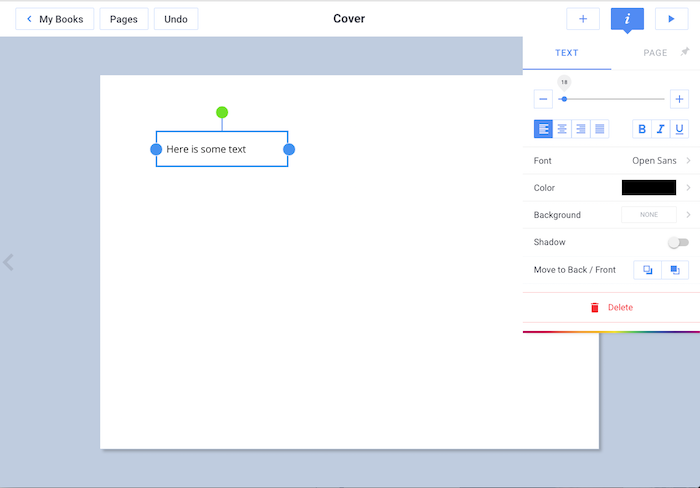
| Once you have added your content you will probably want to change what you have, especailly as you look at your design and layout. The screenshot above shows the menu you get when you look to edit text - you will get similar menus if you want to edit other elements. You can see from this menu you can edit the size, font, colour, background, shdow and position (layer) of the text. | |||||||
 |
|||||||
As well as editing the objects on the page you can also edit the page itself - changing its colour or adding a pattern or border or texture. Once you have finished editing and the book is "finished" tap on the "My Books" in the top left of the page and this will take you back to the homepage. |
|||||||
 |
|||||||
| You can add more pages by tapping on the > and then the + sign on the right hand side of your book or you can go to the Pages box in the top left and copy, move insert or delete pages as you wish. | |||||||
| 4. Exporing / Saving your Book | |||||||
 |
|||||||
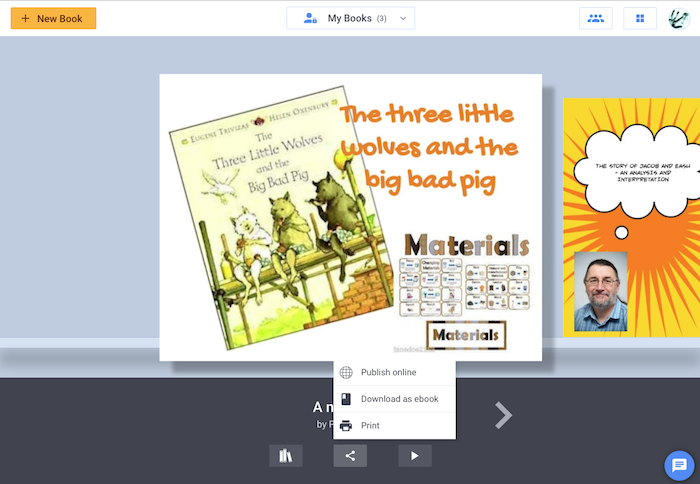
When you are happy you should go back to the home page (click on My Books in the top left) - your work will auto save. When you have finished your book you can export it by clicking on the middle button at the bottom and then Download as an eBook. You can then send this to Julia via Box (details to come later), CANVAS or email (julia.lawrence@hull.ac.uk) |
|||||||
|
|||||||